相关阅读
关注微信公众号 糖果代码铺 ,获取更多 OpenHarmony/Flutter 动态信息。

前言
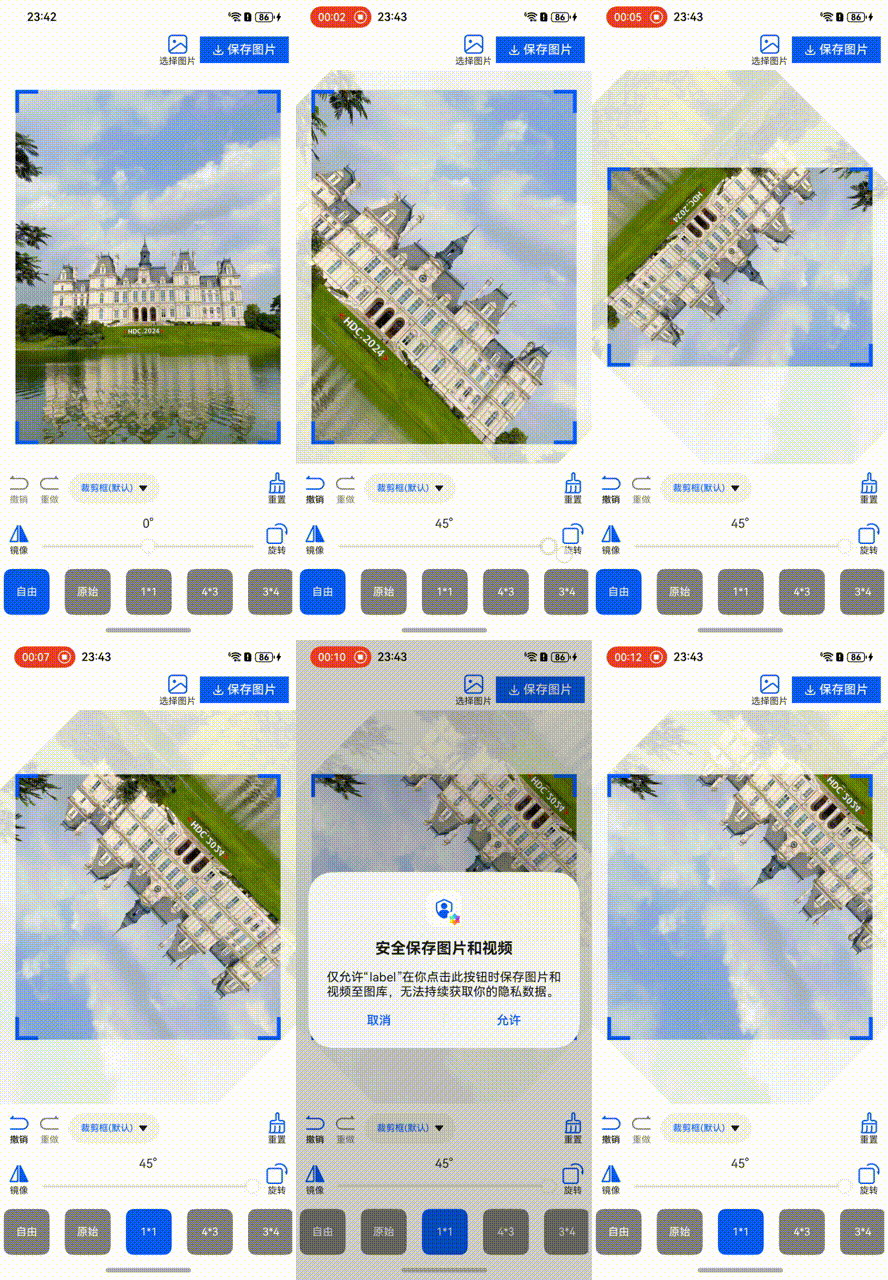
最近在 Flutter 上面升级了 图片裁剪功能 ,随手就把图片裁剪组件迁移到OpenHarmony平台,毕竟都是基于 Canvas 和通用的算法,实现难度不大。

实现
布局
简单讲下OpenHarmony平台的实现,用 2 个 Canvas 组成的,一个负责绘制图片,一个负责绘制裁剪框。
Stack(){
  Canvas(this.imageContext)
  Canvas(this.cropLayerContext)
}
值得注意的是与 Flutter 不同,OpenHarmony中 Canvas 的位置坐标系是基于本身的,也就是说是 (0,0) 开始的,不是基于整个屏幕。
手势
使用 GestureGroup 包含了 PinchGesture 和 PanGesture 两种手势。 PinchGesture 是控制图片缩放;PanGesture 是控制图片的移动,也控制裁剪框的移动。
.gesture(
  GestureGroup(GestureMode.Exclusive, PinchGesture({}).onActionStart((event: GestureEvent) => {
    this.handleScaleStart(event, false,);
  })
    .onActionUpdate((event: GestureEvent) => {
      this.handleScaleUpdate(event, false);
    })
    ,
    PanGesture().onActionStart((event: GestureEvent) => {
      this.handleScaleStart(event, true);
    })
      .onActionUpdate((event: GestureEvent) => {
        this.handleScaleUpdate(event, true);
      }).onActionEnd((event: GestureEvent) => {
      if (this._cropRectMoveType != null) {
        this._cropRectMoveType = null;
        // move to center
        let oldScreenCropRect = this._actionDetails!.cropRect!;
        // not move
        if (OffsetUtils.isSame(oldScreenCropRect.center, this._actionDetails!.cropRectLayoutRectCenter)) {
          return;
        }
        let centerCropRect = getDestinationRect(
          this._actionDetails!.cropRectLayoutRect!, oldScreenCropRect.size,
        );
        this._startCropRectAutoCenterAnimation(oldScreenCropRect, centerCropRect);
      }

    })
  )

)
手势和移动的代码处理跟 Flutter 平台一样,感兴趣的小伙伴可以自行查看。
裁剪框
要确定是裁剪框移动还是图片移动,我们需要判断是否手势点击是在裁剪框的范围内。
在 onTouch 做处理,通过点击的点是否在裁剪框的区域内部来判断,由 touchOnCropRect 方法完成。
.onTouch((event) => {
  if (event.type == TouchType.Down) {
    this._pointerDown = true;

    if (event.touches.length == 1) {
      let touch = event.touches[0];
      this._cropRectMoveType = this.touchOnCropRect(new geometry.Offset(touch.x, touch.y));
    }

    this._drawLayer();
  } else if (event.type == TouchType.Up || event.type == TouchType.Cancel) {
    if (this._pointerDown) {
      this._pointerDown = false;
      this._drawLayer();
      this._saveCurrentState();
    }
  }
})
具体处理为,判断是否在裁剪框 +- hitTestSize 之后的内外框范围,当我们点击在屏幕上面的时候判断是否点击在了裁剪框的区域里面。
let outerRect = screenCropRect.inflate(hitTestSize);
let innerRect = screenCropRect.deflate(hitTestSize);
算法
边界计算算法在 Flutter 1000万点赞以内最好的图片裁剪组件 - 掘金 (juejin.cn) 文章中已经讲解的比较详细了,如果有疑问可以留言。后面主要讲讲平台差异以及遇到的一些问题。
注意
Canvas 绘制不支持 Matrix4
CanvasRenderingContext2D 的绘制,只支持 Matrix2D。导致最终实现镜像效果的时候,我只能对 Canvas 组件进行 matrix4 transform
Canvas(this.imageContext).transform(matrix4.identity()
  .rotate({
    y: this._rotationYRadians != 0 ? 1 : 0,
    x: 0,
    z: 0,
    angle: NumberUtils.degrees(this._rotationYRadians),
  }))
Geometry
OpenHarmony里面 Offset, Rect, Size, EdgeInsets 都只是简单的 interface ,并没有相关的计算方法。
所以这部分,直接从 Flutter 中移植了过来。值得注意的是比较的时候精度问题,定义一个 precisionErrorTolerance ,当 2 者差距的绝对值小于 precisionErrorTolerance 的时候认为相等。
static precisionErrorTolerance = 1e-10;
Matrix4
Matrix4Transit 的实现跟 Flutter 中的 Matrix4,效果不一样,而也没办法修改,所以从 Flutter 中移植 Matrix4 过来。
Matrix4 是整个边界计算和最终图片输出的核心。
getTransform(): Matrix4 {
  const origin: geometry.Offset = this.cropRectLayoutRectCenter;
  const result = Matrix4.identity();

  result.translate(origin.dx, origin.dy);
  if (this.rotationYRadians !== 0) {
    result.multiply(Matrix4.rotationY(this.rotationYRadians));
  }
  if (this.hasRotateDegrees) {
    result.multiply(Matrix4.rotationZ(this.rotateRadians));
  }
  result.translate(-origin.dx, -origin.dy);

  return result;
}

getImagePath(rect?: geometry.Rect): drawing.Path {
  rect = rect ?? this.destinationRect!;

  const result = this.getTransform();

  const corners: geometry.Offset[] = [
    rect.topLeft,
    rect.topRight,
    rect.bottomRight,
    rect.bottomLeft,
  ];

  const rotatedCorners: geometry.Offset[] = corners.map((corner: geometry.Offset) => {
    const cornerVector = new Vector4(corner.dx, corner.dy, 0.0, 1.0);
    const newCornerVector = result.transform(cornerVector);
    return new geometry.Offset(newCornerVector.x, newCornerVector.y);
  });

  const path = new drawing.Path();

  path.moveTo(rotatedCorners[0].dx, rotatedCorners[0].dy);
  path.lineTo(rotatedCorners[1].dx, rotatedCorners[1].dy);
  path.lineTo(rotatedCorners[2].dx, rotatedCorners[2].dy);
  path.lineTo(rotatedCorners[3].dx, rotatedCorners[3].dy);
  path.close();

  return path;
}
动画
不支持对 Rect 做动画, 直接从 Flutter 把 RectTween 移植过来,当动画触发 onFrame 的时候通过 RectTween.transform 转化成对应的 Rect 值。
_startCropRectAutoCenterAnimation
(begin: geometry.Rect, end: geometry.Rect): void {
  let options: AnimatorOptions = {
    duration: this._config!.cropRectAutoCenterAnimationDuration,
    easing: "linear",
    delay: 0,
    fill: "forwards",
    direction: "normal",
    iterations: 1,
    begin: 0,
    end: 1,
  };
  this._cropRectAutoCenterRect = new RectTween(begin, end);

  this._cropRectAutoCenterAnimator = animator.create(options);
  this._cropRectAutoCenterAnimator!.onFrame = (value) => {
    this._isAnimating = true;
    if (this._cropRectAutoCenterRect != undefined) {
      this._updateUIIfNeed(() => {
        this._doCropAutoCenterAnimation(this._cropRectAutoCenterRect!.transform(value));
      });
    }

  };
  this._cropRectAutoCenterAnimator.onFinish = this._cropRectAutoCenterAnimator.onCancel = () => {

    this._cropRectAutoCenterAnimator = undefined;
    this._cropRectAutoCenterRect = undefined;
    this._isAnimating = false;
    this._saveCurrentState();
  };

  this._cropRectAutoCenterAnimator.play();
}
Color
arkts 中有各种 Color, 组件的颜色是 ResourceColor
declare type ResourceColor = Color | number | string | Resource;
其中
Color 是颜色枚举值。number 是 HEX 格式颜色。
支持 rgb 或者 argb 。示例:0xffffff,0xffff0000。number 无法识别传入位数,格式选择依据值的大小,例如 0x00ffffff 作 rgb 格式解析
string 是 rgb 或者 argb 格式颜色。
示例:'#ffffff', '#ff000000', 'rgb(255, 100, 255)', 'rgba(255, 100, 255, 0.5)'。
Resource 使用引入资源的方式,引入系统资源或者应用资源中的颜色。
而 Canvas 的颜色为下面类型。
string | number | CanvasGradient | CanvasPattern;
- 对于枚举
Color,只能 swtich case 写出对应的颜色。
- 对于
string 和 number 可以这样判断。
if (typeof color === "string" || typeof color === "number") {
  return color;
}
- 而对于
Resource 我们需要通过 context.resourceManager 去获取颜色,需要注意的是 context.resourceManager 的 getColor 获得到的是 10 进制的颜色数值。真正使用的时候需要转换一下。由于系统的颜色 sys.color.brand 是不透明的,所以 A 通道直接没有去获取。
特别注意的是: sys.color.brand 在被打成静态 har 包之后,会获取到错误的 resource id 1, 发生 {"code":9001001,"message":"GetColorById failed state"} 错误,code 解释为 : Invalid resource ID. 解决方案是通过 onWillApplyTheme 中得到的 Theme 来获取正确的 ID。即 (theme.colors.brand as Resource).id, 正确的 ID 应该 125830976 。
onWillApplyTheme(theme: Theme) {
  this.initSystemColor(theme).then(() => {
    this._drawLayer();
  });
}

async initSystemColor(theme: Theme): Promise<void> {
  let context = getContext(this);
  try {
    let brandColor = theme.colors.brand as Resource;
    let backgroundColor = theme.colors.backgroundPrimary as Resource;
    this._brandColor = decimalToHexColor(await context.resourceManager.getColor(brandColor.id));
    this._backgroundColor =
      decimalToHexColor(await context.resourceManager.getColor(backgroundColor.id));
  } catch (e) {
    console.log('initSystemColor has error:', JSON.stringify(e))
    this._brandColor ??= '#FF0A59F7';
    this._backgroundColor ??= '#FFFFFFFF';
  }
}
export function decimalToHexColor(decimalColor: number, opacity: number = 1): string {
  // 提取红色分量
  const r = (decimalColor >> 16) & 0xFF;
  // 提取绿色分量
  const g = (decimalColor >> 8) & 0xFF;
  // 提取蓝色分量
  const b = decimalColor & 0xFF;
  const toHex = (num: number) => num.toString(16).padStart(2, '0').toUpperCase();
  // 合并并返回 16 进制字符串
  return `#${toHex(parseInt((255 * opacity).toString(), 10))}${toHex(r)}${toHex(g)}${toHex(b)}`.toUpperCase();
}
弧度角度
弧度和角度,有的 api 需要弧度,有的 api 需要角度,更有甚至,它叫角度,但是需要你传入弧度。
radians 弧度degrees 度angle 我的理解是 角度
.transform(matrix4.identity()
  .rotate({
    y: this._rotationYRadians != 0 ? 1 : 0,
    x: 0,
    z: 0,
    angle: NumberUtils.degrees(this._rotationYRadians),
  }))
ChangeNotifier
不管在什么平台,我对 EventBus 是无感的,OpenHarmony也有类似的。ChangeNotifier 直接从 Flutter 中移植过来,用于监听变化,组件中用于通知裁剪历史变化。
关于组件引用方式
我在本地例子里面是使用 import * as image_cropper from "@candies/image_cropper";
image_cropper.ImageCropper(
  {
    image: this.image,
    config: this.config,
  }
)
本地运行正常,但是通过 ohpm install @candies/image_cropper 安装之后,运行报错。
1 ERROR: ArkTS:ERROR File: 】MyApplication4/entry/src/main/ets/pages/Index.ets:24:9
 'image_cropper.ImageCropper(
          {
            image: this.image,
            config: this.config,
          }
        )' does not meet UI component syntax.

COMPILE RESULT:FAIL {ERROR:2 WARN:5}
> hvigor ERROR: BUILD FAILED in 479 ms
解决方案是引用方式改下下面的方法:
import { ImageCropper } from "@candies/image_cropper";
使用如下:
import * as image_cropper from "@candies/image_cropper";
import { ImageCropper } from "@candies/image_cropper";
import { image } from '@kit.ImageKit';

@Entry
@Component
struct Index {
  @State image: image.ImageSource | undefined = undefined;
  private controller: image_cropper.ImageCropperController = new image_cropper.ImageCropperController();
  @State config: image_cropper.ImageCropperConfig = new image_cropper.ImageCropperConfig(
    {
      maxScale: 8,
      cropRectPadding: image_cropper.geometry.EdgeInsets.all(20),
      controller: this.controller,
      initCropRectType: image_cropper.InitCropRectType.imageRect,
      cropAspectRatio: image_cropper.CropAspectRatios.custom,
    }
  );

  build() {
    Column() {
      if (this.image != undefined) {
        ImageCropper(
          {
            image: this.image,
            config: this.config,
          }
        )
      }
    }
  }
}
安装
你可以通过下面的命令安装改组件。
ohpm install @candies/image_cropper
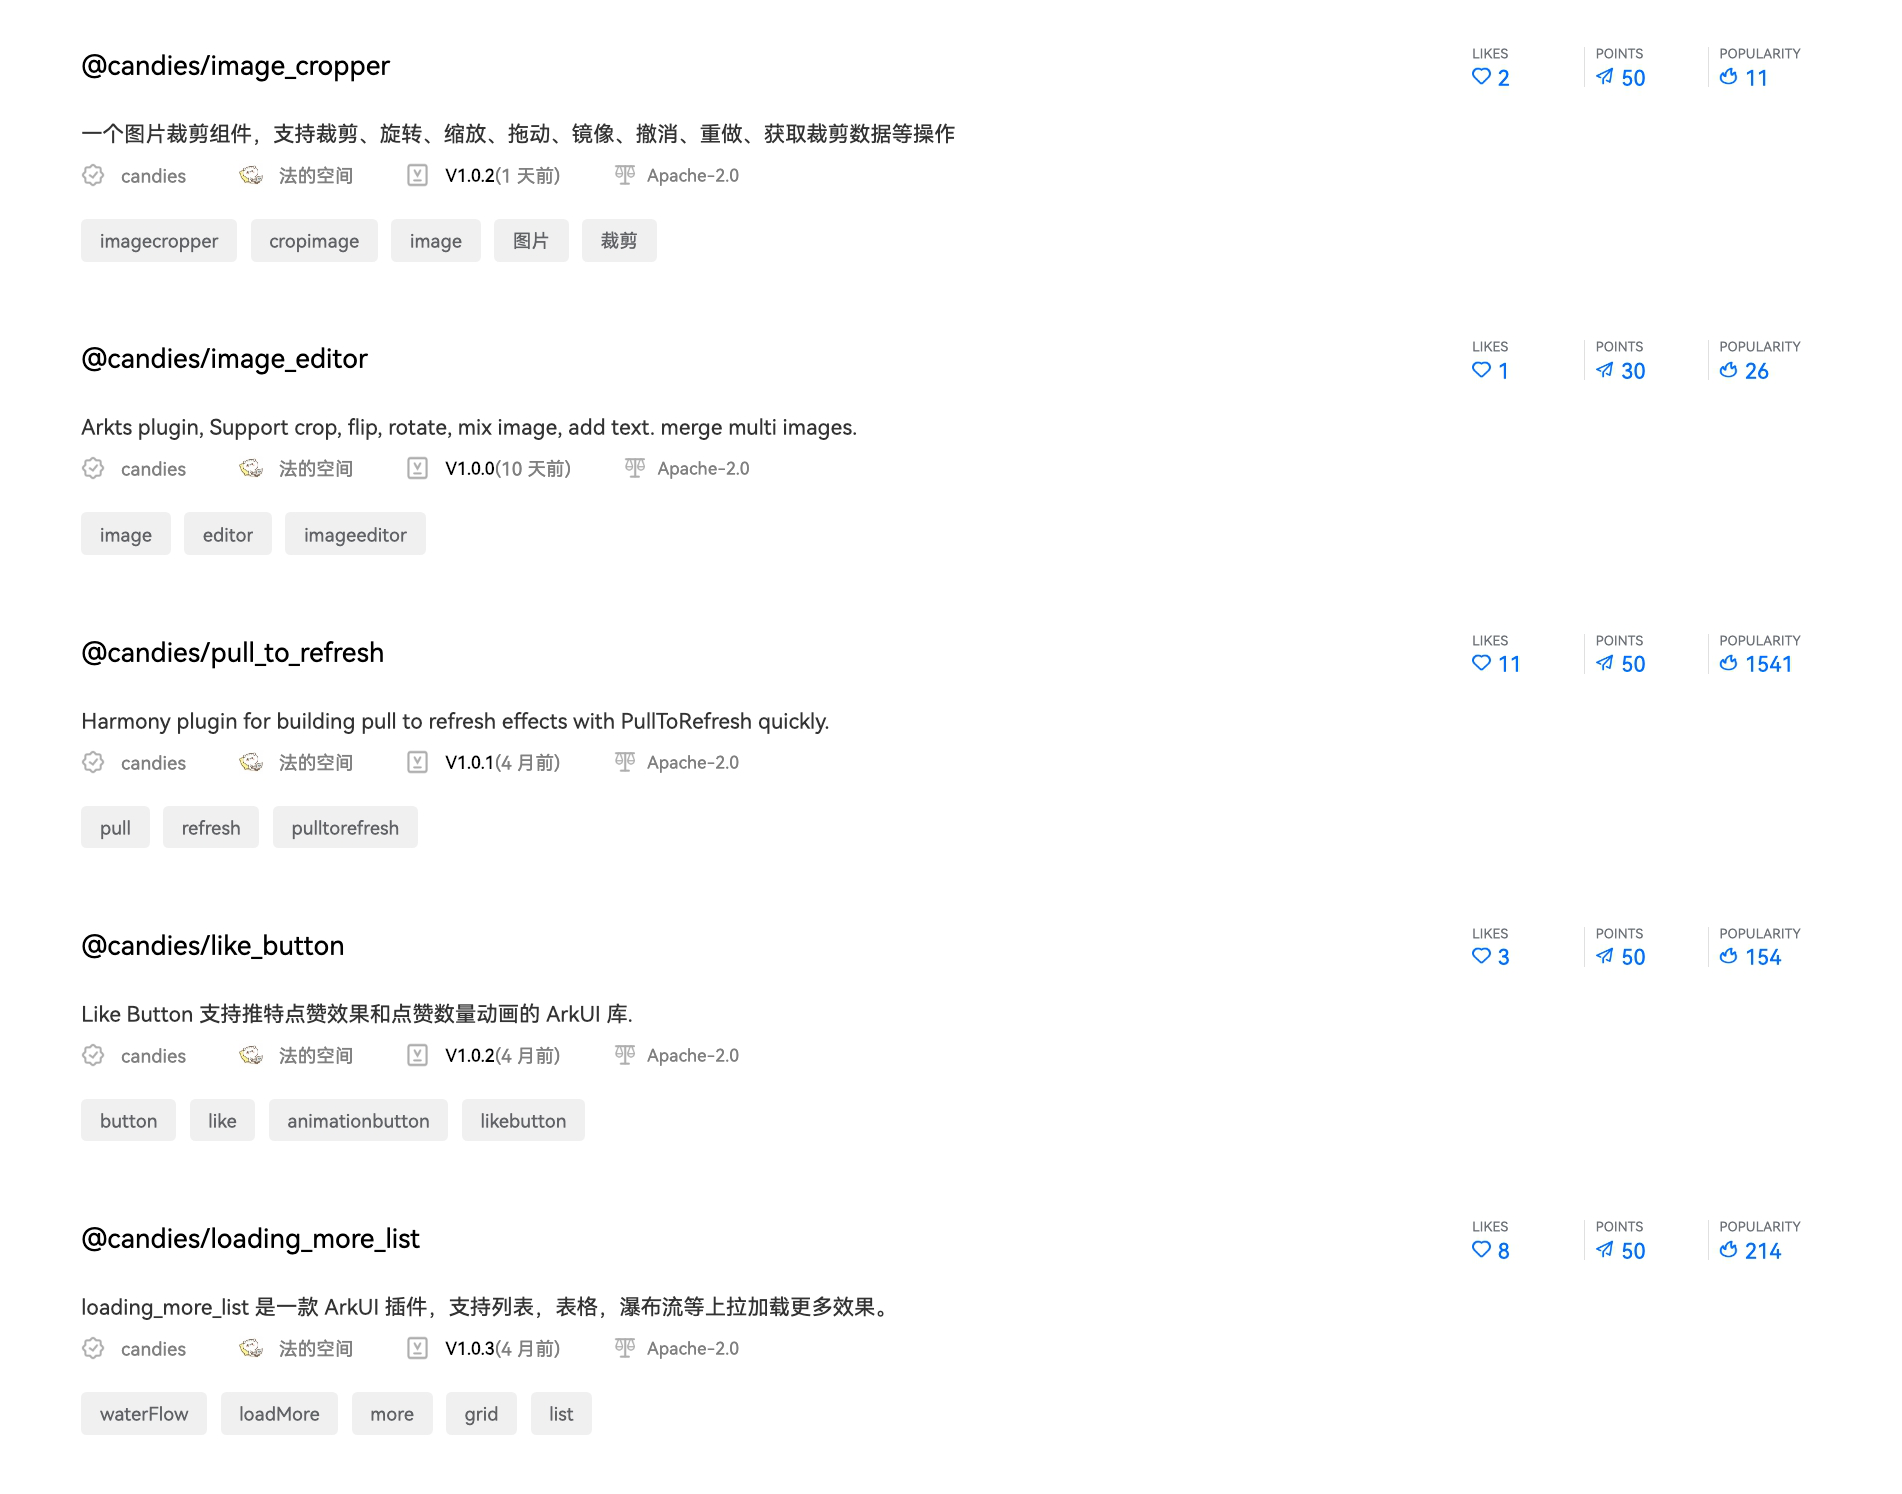
更多糖果组件你可以关注: https://ohpm.openharmony.cn/#/cn/result?sortedType=relevancy&page=1&q=candies
使用
完整例子: https://github.com/HarmonyCandies/image_cropper/blob/main/entry/src/main/ets/pages/Index.ets
参数
| 参数 |
类型 |
描述 |
| image |
image.ImageSource |
需要裁剪图片的数据源 |
| config |
image_cropper.ImageCropperConfig |
裁剪的一些参数设置 |
import * as image_cropper from "@candies/image_cropper";
import { ImageCropper } from "@candies/image_cropper";
import { image } from '@kit.ImageKit';

@Entry
@Component
struct Index {
  @State image: image.ImageSource | undefined = undefined;
  private controller: image_cropper.ImageCropperController = new image_cropper.ImageCropperController();
  @State config: image_cropper.ImageCropperConfig = new image_cropper.ImageCropperConfig(
    {
      maxScale: 8,
      cropRectPadding: image_cropper.geometry.EdgeInsets.all(20),
      controller: this.controller,
      initCropRectType: image_cropper.InitCropRectType.imageRect,
      cropAspectRatio: image_cropper.CropAspectRatios.custom,
    }
  );

  build() {
    Column() {
      if (this.image != undefined) {
        ImageCropper(
          {
            image: this.image,
            config: this.config,
          }
        )
      }
    }
  }
}
裁剪配置
export interface ImageCropperConfigOptions {
  /// Maximum scale factor for zooming the image during editing.
  /// Determines how far the user can zoom in on the image.
  maxScale?: number;

  /// Padding between the crop rect and the layout or image boundaries.
  /// Helps to provide spacing around the crop rect within the editor.
  cropRectPadding?: geometry.EdgeInsets;

  /// Size of the corner handles for the crop rect.
  /// These are the draggable shapes at the corners of the crop rectangle.
  cornerSize?: geometry.Size;

  /// Color of the corner handles for the crop rect.
  /// Defaults to the primary color if not provided.
  cornerColor?: string | number | CanvasGradient | CanvasPattern;

  /// Color of the crop boundary lines.
  /// Defaults to `scaffoldBackgroundColor.withOpacity(0.7)` if not specified.
  lineColor?: string | number | CanvasGradient | CanvasPattern;

  /// Thickness of the crop boundary lines.
  /// Controls how bold or thin the crop rect lines appear.
  lineHeight?: number;

  /// Handler that defines the color of the mask applied to the image when the editor is active.
  /// The mask darkens the area outside the crop rect, and its color may vary depending on
  /// whether the user is interacting with the crop rect.
  editorMaskColorHandler?: EditorMaskColorHandler;

  /// The size of the hit test region used to detect user interactions with the crop
  /// rect corners and boundary lines.
  hitTestSize?: number;

  /// Duration for the auto-center animation, which animates the crop rect back to the center
  /// after the user has finished manipulating it.
  cropRectAutoCenterAnimationDuration?: number;

  /// Aspect ratio of the crop rect. This controls the ratio between the width and height of the cropping area.
  /// By default, it's set to custom, allowing freeform cropping unless specified otherwise.
  cropAspectRatio?: number | null;

  /// Initial aspect ratio of the crop rect. This only affects the initial state of the crop rect,
  /// giving users the option to start with a pre-defined aspect ratio.
  initialCropAspectRatio?: number | null;

  /// Specifies how the initial crop rect is defined. It can either be based on the entire image rect
  /// or the layout rect (the visible part of the image).
  initCropRectType?: InitCropRectType;

  /// A custom painter for drawing the crop rect and handles.
  /// This allows for customizing the appearance of the crop boundary and corner handles.
  cropLayerPainter?: ImageCropperLayerPainter;

  /// Speed factor for zooming and panning interactions.
  /// Adjusts how quickly the user can move or zoom the image during editing.
  speed?: number;

  /// Callback triggered when `ImageCropperActionDetails` is changed.
  actionDetailsIsChanged?: ActionDetailsIsChanged;

  /// A controller to manage image editing actions, providing functions like rotating, flipping, undoing, and redoing actions..
  /// This allows for external control of the editing process.
  controller?: ImageCropperController;
}
| 参数 |
描述 |
默认 |
| maxScale |
最大的缩放倍数 |
5.0 |
| cropRectPadding |
裁剪框跟图片 layout 区域之间的距离。最好是保持一定距离,不然裁剪框边界很难进行拖拽 |
EdgeInsets.all(20.0) |
| cornerSize |
裁剪框四角图形的大小 |
Size(30.0, 5.0) |
| cornerColor |
裁剪框四角图形的颜色 |
'sys.color.brand' |
| lineColor |
裁剪框线的颜色 |
'sys.color.background_primary' 透明度 0.7 |
| lineHeight |
裁剪框线的高度 |
0.6 |
| editorMaskColorHandler |
蒙层的颜色回调,你可以根据是否手指按下来设置不同的蒙层颜色 |
'sys.color.background_primary' 如果按下透明度 0.4 否则透明度 0.8 |
| hitTestSize |
裁剪框四角以及边线能够拖拽的区域的大小 |
20.0 |
| cropRectAutoCenterAnimationDuration |
当裁剪框拖拽变化结束之后,自动适应到中间的动画的时长 |
200 milliseconds |
| cropAspectRatio |
裁剪框的宽高比 |
null(无宽高比) |
| initialCropAspectRatio |
初始化的裁剪框的宽高比 |
null(custom: 填充满图片原始宽高比) |
| initCropRectType |
剪切框的初始化类型(根据图片初始化区域或者图片的 layout 区域) |
imageRect |
| controller |
提供旋转,翻转,撤销,重做,重置,重新设置裁剪比例,获取裁剪之后图片数据等操作 |
null |
| actionDetailsIsChanged |
裁剪操作变化的时候回调 |
null |
| speed |
缩放平移图片的速度 |
1 |
| cropLayerPainter |
用于绘制裁剪框图层 |
ImageCropperLayerPainter |
裁剪框的宽高比
这是一个 number | null 类型,你可以自定义裁剪框的宽高比。
如果为 null,那就没有宽高比限制。
如果小于等于 0,宽高比等于图片的宽高比。
下面是一些定义好了的宽高比
export class CropAspectRatios {
  /// No aspect ratio for crop; free-form cropping is allowed.
  static custom: number | null = null;
  /// The same as the original aspect ratio of the image.
  /// if it's equal or less than 0, it will be treated as original.
  static original: number = 0.0;
  /// Aspect ratio of 1:1 (square).
  static ratio1_1: number = 1.0;
  /// Aspect ratio of 3:4 (portrait).
  static ratio3_4: number = 3.0 / 4.0;
  /// Aspect ratio of 4:3 (landscape).
  static ratio4_3: number = 4.0 / 3.0;
  /// Aspect ratio of 9:16 (portrait).
  static ratio9_16: number = 9.0 / 16.0;
  /// Aspect ratio of 16:9 (landscape).
  static ratio16_9: number = 16.0 / 9.0;
}
裁剪图层 Painter
你现在可以通过覆写 [ImageCropperConfig.cropLayerPainter] 里面的方法来自定裁剪图层.
自定义例子: https://github.com/HarmonyCandies/image_cropper/blob/main/entry/src/main/ets/painter.ets
export class ImageCropperLayerPainter {
  /// Paint the entire crop layer, including mask, lines, and corners
  /// The rect may be bigger than size when we rotate crop rect.
  /// Adjust the rect to ensure the mask covers the whole area after rotation
  public  paint(
    config: ImageCropperLayerPainterConfig
  ): void {

    // Draw the mask layer
    this.paintMask(config);

    // Draw the grid lines
    this.paintLines(config);

    // Draw the corners of the crop area
    this.paintCorners(config);
  }

  /// Draw corners of the crop area
  protected paintCorners(config: ImageCropperLayerPainterConfig): void {

  }

  /// Draw the mask over the crop area
  protected paintMask(config: ImageCropperLayerPainterConfig): void {

  }

  /// Draw grid lines inside the crop area
  protected paintLines(config: ImageCropperLayerPainterConfig): void {

  }
}
裁剪控制器
ImageCropperController 提供旋转,翻转,撤销,重做,重置,重新设置裁剪比例,获取裁剪之后图片数据等操作。
翻转
| 参数 |
描述 |
默认 |
| animation |
是否开启动画 |
false |
| duration |
动画时长 |
200 milliseconds |
export interface FlipOptions {
    animation?: boolean,
    duration?: number,
  }

  flip(options?: FlipOptions)

  controller.flip();
旋转
| 参数 |
描述 |
默认 |
| animation |
是否开启动画 |
false |
| duration |
动画时长 |
200 milliseconds |
| degree |
旋转角度 |
90 |
| rotateCropRect |
是否旋转裁剪框 |
true |
当 rotateCropRect 为 true 并且 degree 为 90 度时,裁剪框也会跟着旋转。
export interface RotateOptions {
     degree?: number,
     animation?: boolean,
     duration?: number,
     rotateCropRect?: boolean,
   }

   rotate(options?: RotateOptions)

   controller.rotate();
重新设置裁剪比例
重新设置裁剪框的宽高比
controller.updateCropAspectRatio(CropAspectRatios.ratio4_3);
撤消
撤销上一步操作
// 判断是否能撤销
  bool canUndo = controller.canUndo;
  // 撤销
  controller.undo();
重做
重做下一步操作
// 判断是否能重做
  bool canRedo = controller.canRedo;
  // 重做
  controller.redo();
重置
重置所有操作
controller.reset();
历史
// 获取当前是第几个操作
   controller.getCurrentIndex();
   // 获取操作历史
   controller.getHistory();
   // 保存当前状态
   controller.saveCurrentState();
   // 获取当前操作对应的配置
   controller.getCurrentConfig();
裁剪数据
获取裁剪之后的图片数据, 返回一个 PixelMap 对象
controller.getCroppedImage();
获取状态信息
controller.getActionDetails();
controller.rotateDegrees;
controller.cropAspectRatio;
controller.originalCropAspectRatio;
controller.originalCropAspectRatio;
结语
Poor ArkTS,No Extension,No Operator, No Named Parameters。
在迁移过程中,你需要面对的主要是不同语言的差异化,不能说谁好谁不好,只是大家更习惯谁而已。
目前在OpenHarmony平台,总共迁移了 5 个库过去,如果你也想贡献OpenHarmony平台,欢迎加入 HarmonyCandies,一起共建OpenHarmony平台社区生态。

爱 OpenHarmony ,爱 糖果,欢迎加入Harmony Candies,一起生产可爱的.
